



Electronic music‘s most addictive basslines arrive via repeated 16th-note MIDI patterns, velocity modulation, and split-layer architecture. Each technique builds on the last, transforming basic filtered saw waves into complex, groove-locked foundations.
Level 4: Classic Filtered Saw Rolling Bass
The foundational workhorse that gets dance tracks moving
You start with repeated 16th-note MIDI notes, typically using a saw wave shaped with a low-pass filter and envelope modulation. The filter envelope creates a short, plucky attack that produces the characteristic rolling motion. Sidechain compression keyed from the kick reduces bass volume when the kick hits, carving sonic space and creating that signature pumping effect. According to Ableton, this compression process uses an external signal as the compressor’s trigger, allowing rhythmic gain reduction that prevents frequency masking between kick and bass.
Most producers cut their teeth on this technique. A new producer, fresh off tutorial videos, can dial this in and suddenly their track hits harder than a Monday morning alarm. The bass feels alive, like a relentless piston pumping pure energy.
Level 3: Velocity and Sub-Enhanced Rolling Bass
Dynamic movement without altering the core groove
You retain the same 16th-note rhythm but add movement through changing MIDI-note velocities. Ableton’s reference manual confirms that velocity values can be edited independently for individual notes. Assigning velocity to filter cutoff in your synthesizer means harder-played notes open the filter further and sound brighter. It’s like upgrading a flip phone; the basic function remains, but the nuances make all the difference.
A dedicated sub-bass layer strengthens the low end and provides crucial sonic weight. This integration of velocity modulation and a sub-layer transforms a functional groove into something with palpable girth and subtle dynamism. Anyone whose track ever felt like diet soda will appreciate this upgrade.
Level 2: Split Sub/Mid Layer Rolling Bass
Separate control channels for mixing precision
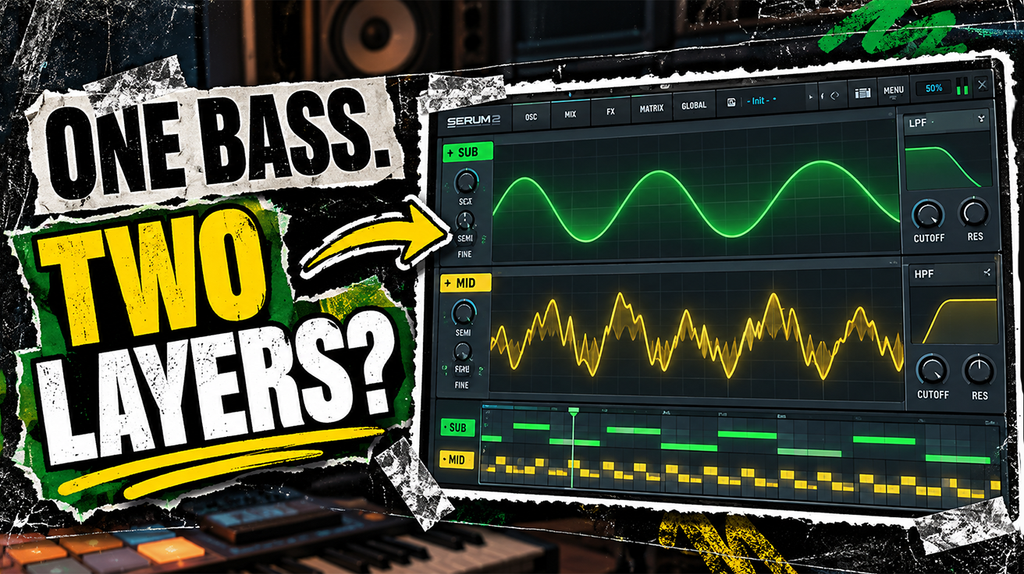
Relying on a single bass sound for an entire track is like expecting one emoji to convey an entire breakup. You divide the bass into separate sub and mid layers for nuanced control during mixing. The sub layer focuses on low frequencies and generally receives stronger sidechain ducking, while the mid layer is high-pass-filtered and can use lighter ducking to deliver essential character.
Custom wavetables in Xfer Serum can be built from sine-wave harmonics, emphasizing fifths and octaves for distinctive timbre beyond standard saw waves. Xfer’s official documentation describes Serum as an instrument with multiple oscillators, dual filters, configurable envelopes, and LFOs assignable to nearly any control. Unison processing adds midrange width. This granular control makes bass not just felt, but truly heard.
Level 1: Grooved Rolling Bass with Octave Jumps and Accent Layer
Rhythmic accents and pitch movement that command attention
Octave jumps within the mid-layer MIDI pattern inject rhythmic accents without requiring a completely different basic rhythm. These pitch changes add emphasis and movement, turning a predictable pulse into a captivating current. You’ve heard countless basslines that just plod along, content to hold down the fort instead of commanding attention.
An additional accent layer uses a filtered saw or similar waveform with pitch movement from LFO or oscillator-pitch modulation to create a short glide effect. Serum’s assignable LFOs and modulation controls support this type of pitch automation. The accent layer is placed where it doesn’t conflict with the kick and has its low frequencies removed via high-pass filtering. Positioned like a perfectly timed meme drop, it ensures the entire bassline is undeniably expressive and alive.